Node_car: A Remote Controlled Raspberry Car With Node.js
Realized in 2017 Tags: node.js, raspberry, robot, remote-control, streaming
This project consists of a robot built with Raspberry Pi 3 that can be controlled remotely. The first server (written in Node.js) listens to commands from the client while another server (written in python) transmits the images captured by the robot's camera. The connection is established via Wi-Fi so you can control it from your pc (keyboard), your tablet (touchscreen) or even from your smartphone (touchscreen plus accelerometer).
Index
Hardware components
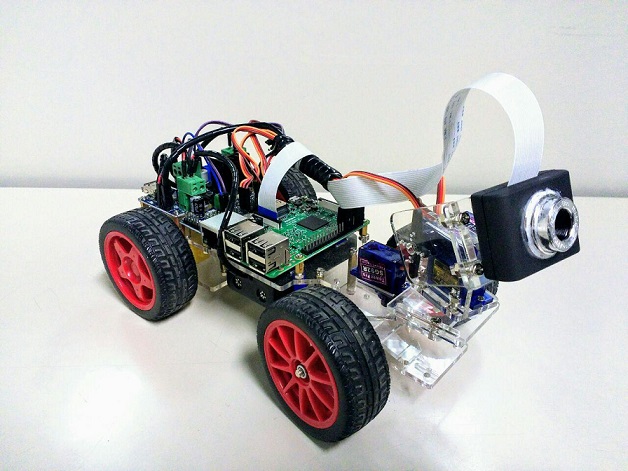
I started with a commercial kit, where I took the basics hardware components. I chose the Sounfounder’s kit because it seemed simple and well documented, so I used their assembly instructions to build up the robot and then I developed my method to handle it (I didn't use their software). You can find their documentation here while the video guidance is left below.
I admit I had some problems with their components, such as the wheel that did not fit the gearbox or the frequent shutdown of the device caused by a defective battery holder, but in general, I am satisfied with this kit, I did not regret my choice, perhaps I've just been unlucky.
My customizations
Once I finished assembling the robot, I made some personal customizations:- I purchased and installed an official picamera module instead of the cheap USB camera provided by the kit (This is important because of the software not support the USB camera. But don't worry, if you want to use the USB camera you can use the software provided by Sunfounder);
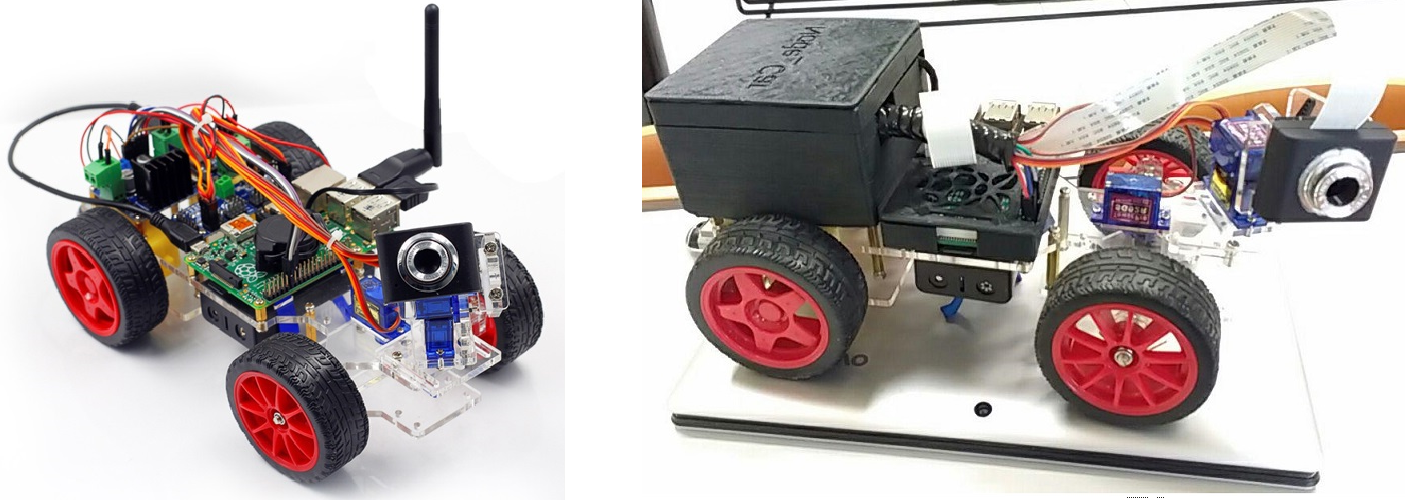
- I removed the USB cable for power because it was unesthetic and unsuitable. I powered the Raspberry directly by the GPIO's pin;
- In collaboration with the ICxT laboratory of Turin we have created a protective cover made with 3D printer;
- I switched the 3 servo motors with a newer and more powerful version (Tower pro MG90S instead of SG90);
- I removed the Usb Wi-Fi adapter because for raspberry pi 3 isn’t necessary. (it already has an integrated module for this)
Raspberry Configuration
Once we have assembled the robot, we have to set up a connection between it and our pc, to do this we have to configure the raspberry. First, of all, we need to install an OS. I chose Raspbian OS and I flashed it into my sd card with Etcher and then I installed it. At this point, I downloaded the tightvncserver and xrdp to get the remote desktop and then I installed the latest version of Node.js. ( The remote desktop is not quite necessary, you can simply use ssh, but I prefer this way). (If you need help to execute this step I recommend you to read this article.)
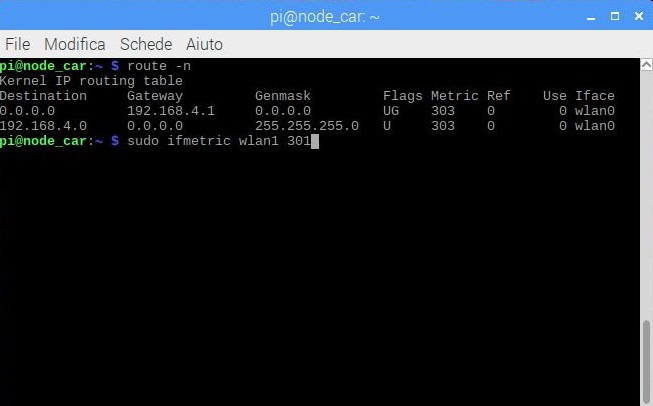
It is not enough to connect them to the same router because this would limit the portability and usability of the robot and could introduce delays due to traffic congestion, so I used Hostapd to make the Raspberry an Access Point to connect the client directly to it. To do this I installed and configured hostapd and dnsmasq.
I do not have configure the firewall to the forwarding of the packets through the web but rather I used the raspberry's network card to receive packets from client while a second wi-fi interface could be used to browse the web (maybe to install node.js modules or other stuff). (Read this discussion has helped me a lot to do it.)
So I leave you below the files of my configuration but I suggest you read this article first. Open the dhcpcd configuration file and add the following line at the bottom of the file:
              //Enter -> sudo nano /etc/dhcpcd.conf

                interface wlan0
                static ip_address=192.168.4.1/24
                static routers=192.168.4.1 //static ip of raspberry
                static domain_name_servers=8.8.8.8
              //Enter -> sudo nano /ect/network/interfaces

                source-directory /etc/network/interfaces.d
              //Enter -> sudo nano /etc/hostapd/hostapd.conf

                interface=wlan0
                driver=nl80211
                ssid=node_network
                hw_mode=g
                channel=7
                ieee80211n=1
                wmm_enabled=1
                ht_capab=[HT40][SHORT-GI-20][DSSS_CCK-40]
                macaddr_acl=0
                auth_algs=1
                ignore_broadcast_ssid=0
                wpa=2
                wpa_passphrase= "your wpa password"
                wpa_key_mgmt=WPA-PSK
                wpa_pairwise=TKIP
                wpa_pairwise=CCMP
              //Enter -> sudo nano /etc/dnsmasq.conf

                dhcp-mac=set:client_is_a_pi,B8:27:EB:*:*:*
                dhcp-reply-delay=tag:client_is_a_pi,2

                interface=wlan0
                domain-needed
                bogus-priv
                dhcp-range=192.168.4.8,192.168.4.250,12h
              //Enter -> sudo nano etc/wpa_supplicant/wpa_supplicant-wlan1.conf

                ctrl_interface=DIR=/var/run/wpa_supplicant GROUP=netdev
                update_config=1
                country=IT
Node_car.js: a library to get the control of the robot
Now we finally start talking about software. First, of all, we need to take full control of each component. Two servo motors move the camera and they are both connected to the Adafruit Pca9685. The anterior wheels are also turned by a servo connected to the Pca9685. The engines are connected directly at the Gpio (but the speed is set by the pins of Pca9685) and they move the driving rear. So we can control every single component through communications with gpio and pca9685. There are a lot of well-done libraries already implemented that allows you to program these components, so I decided to base my work on adafruit-pca9685 and Gpio. Starting from this two libraries I created my library called Node_car.js. Node_car.js uses OOP to offer high-level methods that are really simple to use and understand, to automatically check the parameters before sending them to the low-level, and to realize features such the autonomous camera movement following the steering wheel direction realized through the observer/observable pattern.
Example of code to move forward:1 2 3 4 5 6 7 8 9 | var node_car = require('./node_car.js'); if (dir == 1){ node_car.motor_r.move_forward(speed); node_car.motor_l.move_forward(speed); } else { node_car.motor_r.move_backward(speed); node_car.motor_l.move_backward(speed); } |
(Full code is avaible here).
Command_server.js: receives commands from client and forward the instructions to the node_car.js
I used the web sockets to receive commands from the client's browser. The server starts listening on port 8085 and it's programmed to satisfy all the possible client signals that change depending on the type of device used. This is because each type of device has a different way of receiving user input. For example: - if you use a pc, you will send the command from a keyboard, so the server will receive a single continuous command until you stop pressing the button; - if you use a tablet, you will use a virtual joystick and you will send frequent updates on the position of the stick. A continuous input is very different from many single inputs.
For example, I left the function that drives the robot forward below. A "speed" parameter is required to represent the current degree of acceleration (captured by the smartphone's accelerometers or tablet's virtual-stick). If we don't have this information (perhaps because we receive this command from a keyboard) we need to call a function (providing the direction to move, i.e. forward or backward).
1 2 3 4 5 6 7 8 9 10 11 12 13 14 15 16 17 18 19 20 21 22 23 24 25 26 | socket.on('run', function(speed) { if (speed){ node_car.motor_r.move_forward(2000 + (speed * 20)); node_car.motor_l.move_forward(2000 + (speed * 20)); } else { if (motor_on == false){ motor_on = true; running(1, 1); } } }); function running(dir, count){ if(motor_on == false) return; //stop loop speed = (Math.log(count)*600)+2010; if (dir == 1){ node_car.motor_r.move_forward(speed); node_car.motor_l.move_forward(speed); } else { node_car.motor_r.move_backward(speed); node_car.motor_l.move_backward(speed); } if (!node_car.motor_r.get_limit()) setTimeout( running, 10, dir, count+1); console.log('Actual speed value: '+ speed); } |
(Full code is avaible here).
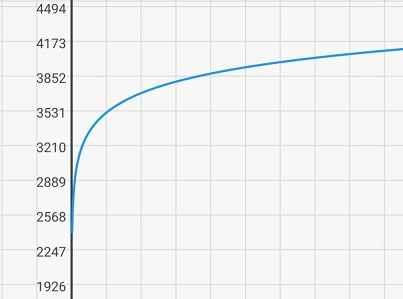
This function will recursively repeat the call to itself after a timeout and it will increment each time the "speed" parameter. The timer is used to give the robot some time to receive new commands and update its internal status, ie to interrupt the cycle conditions. This is because node.js is a single thread system. (I had this idea while I was reading this article). The increment of the speed is not linear but rather logarithmic, this gets better user experience). As you can see in this graph:
Streaming Server
For the streaming server, I chose to use picamera, the best Raspberry camera library. In particular, I based my server on this examples that uses a multithreaded system to serve more client simultaneously without degrading the performance. In the end, we need to automatically start the server at the boot. I haven't had problem with phyton3 but for node.js server, I needed to install pm2..
        //To automatically run the servers at boot

          sudo pm2 start /home/pi/share/sorgente/command_server/server.js
          python3 /home/pi/share/sorgente/streaming_server/multithread.py &
Client Interface
Now let's talk about the client interfaces. I have built different interfaces for different customer devices. I show you these interfaces with a video and a brief explanation:
Pc Interface
My principal goal during the development of this interface was to take advantage of the large space present on the keyboard, to build a comfortable controller. I set "wasd" keys to move the robot and the directional keys to move the camera.Tablet Interface
My principal goal during the development of this interface was the screen cleaning, so the screen should not have been covered by the command buttons. For this reason, I used virtualjoystick.js to use a transparent stick only when the user touches the screen:Smartphone Interface
Smartphones are structurally similar to a tablet, so they can also use the tablet interface and therefore it would not be necessary to create a specific interface. But I wanted to make the most of the specific characteristics of each device used. So I preferred to implement another interface that can use the smartphone accelerometer to take user input. The result is very fun to use:Tragic Ending
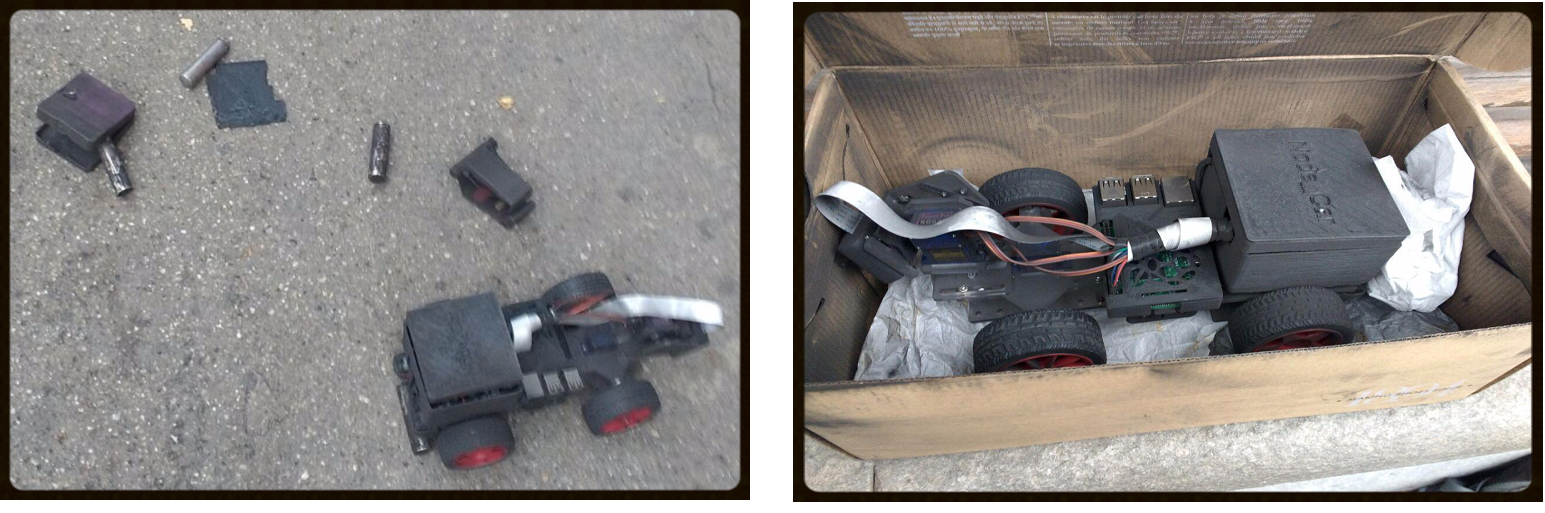
As of today, I can no longer use node_car. This is due to the batteries bought by Samsung. They sent me these batteries with a plastic cover protection because they are very unstable and dangerous. The problem is that the cover was malfunctioning and the batteries are exploded in the same box where I had put my robot, so it was involved in this explosion. (At the moment of explosion the batteries were out of the robot). Unfortunately, the kit is no more available on Amazon Italy and I could not buy and rebuild the Node_car. (i can by a different kit, yes, but it would not be NODE_CAR... it would be another kind of robot). So, Sunfounder, if you read this lines, please add one more kit on Amazon Italy. And Samsung, if you read this lines.. f*ck you.